Animation Blend Space: Difference between revisions
No edit summary |
No edit summary |
||
| (5 intermediate revisions by the same user not shown) | |||
| Line 25: | Line 25: | ||
[[File:Pick_a_skeleton_for_a_blend_space.png]] | [[File:Pick_a_skeleton_for_a_blend_space.png]] | ||
<P> | <P> | ||
In this case we choose the cop skeleton since its what we downloaded from mixamo | In this case we choose the cop skeleton since its what we downloaded from mixamo<br> | ||
Since this is a "Blend Space" with a horizontal and vertical axis, we will just use<br> | |||
the Horizonal, making the "Blend Space" essentially function as a 1D blend space<br> | |||
<p> | |||
#Open up the newly created blend space by clicking on the icon | |||
#In the asset details(on the left hand side), expand the horizontal Axis, and set the name<br> | |||
to speed and the Maximum Axis Value to 700<p> | |||
[[File:Set_name_and_maximum_axis_value1.png]] | |||
<p> | |||
==Dragging the animations== | |||
#Drag in The Animation you want, in this case the Zombie_Idle Animation to the left hand side of the screen | |||
#Click on the diamond you just created from the drag and drop operations | |||
#Speed will appear on the top(If you named it that) make sure its set to 0 | |||
<p> | |||
[[File:Step1_drag_zombie_idle_animation.png]] | |||
<P> | |||
#Next Drag in your walk animations in the middle | |||
#Click the diamond and set the speed to 500 (The maximum character walk speed in unreal is 500 by default) | |||
#After that drag in the run animation | |||
#Click the diamond and set the speed to 700 | |||
<P>You should see something like the picture below<p> | |||
[[File:Walk_run_idle_blend_space.png]] | |||
<p> | |||
To Actually make use of this blend space we have to make a Animation blueprint, that<br> | |||
will get its owner(Attach actor) speed, and choose the animation based on that speed.<br> | |||
You can hit play now to see how it transitions from idle to walking to running<br> | |||
Latest revision as of 22:37, 16 February 2025
A blend space allows you to blend animations together without having to animate the transitions yourself
This is useful for idle/walking/running animations, the blend space allows you to cleanly transition
between the three(or however many) based on a parameter, in most cases it's your characters speed
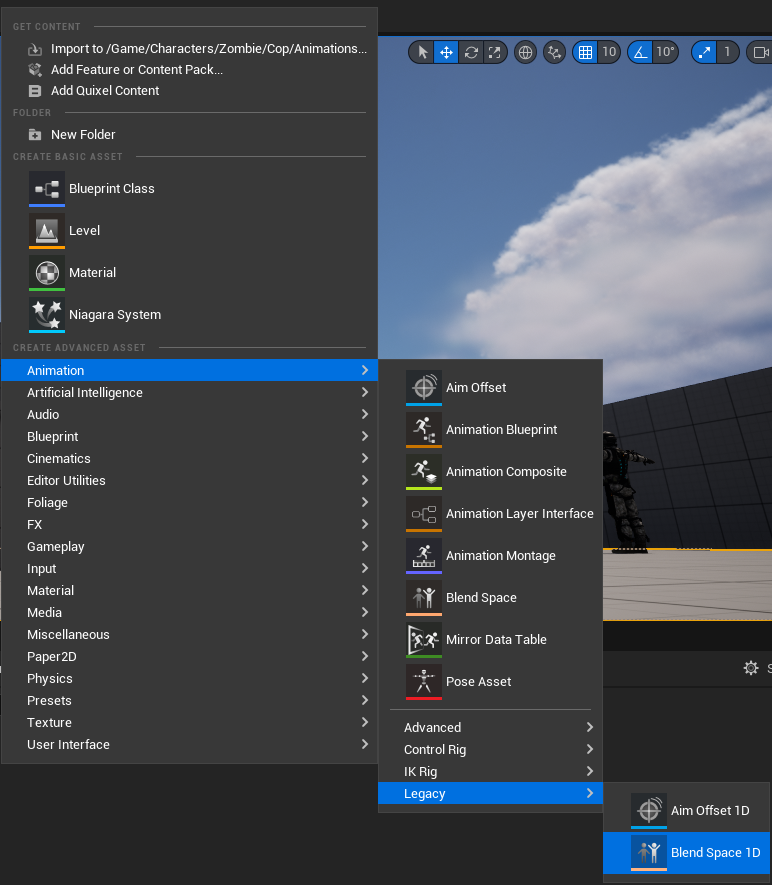
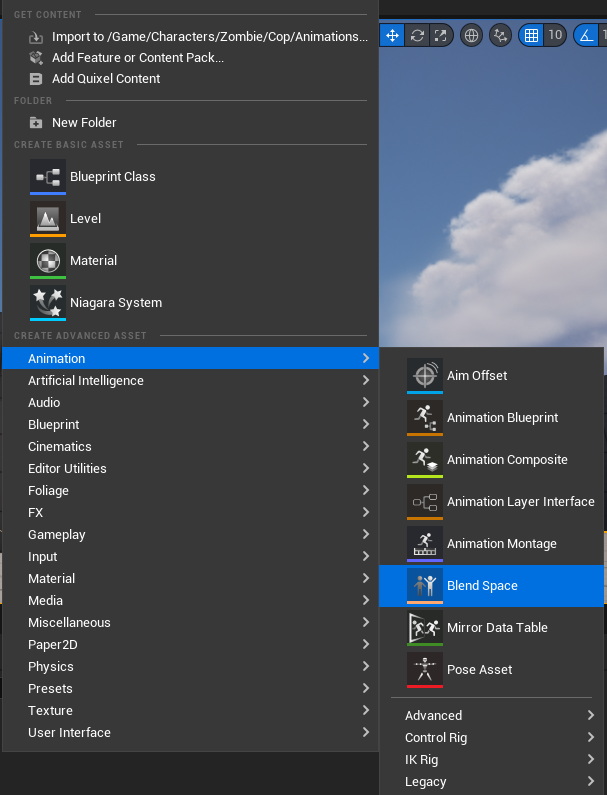
There are two types of blend space, Legenacy 1D blend space (Right click Content drawer->Animations->Legacy->Blend Space 1D)
And Just Blend Space (Right Click content drawer->Animation->Blend Space)
Difference Between 1D Blend Space and Blend Space
There isn't much difference except "Blend Space" has two Parameters(2D) whereas 1D Blend space has one parameter to control the state of the transition.
Creating a blend Space
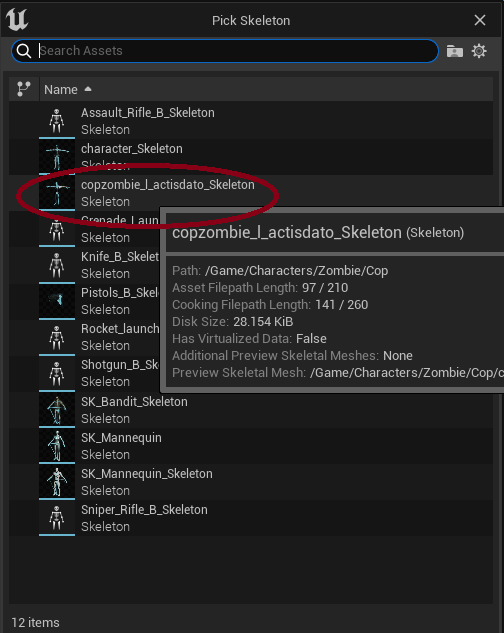
After you select which blend space you want to create, you will see
In this case we choose the cop skeleton since its what we downloaded from mixamo
Since this is a "Blend Space" with a horizontal and vertical axis, we will just use
the Horizonal, making the "Blend Space" essentially function as a 1D blend space
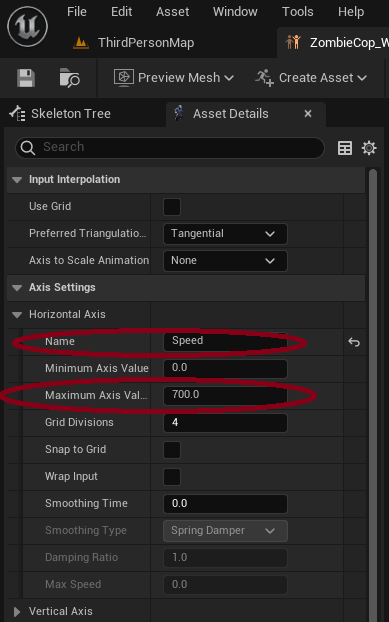
- Open up the newly created blend space by clicking on the icon
- In the asset details(on the left hand side), expand the horizontal Axis, and set the name
to speed and the Maximum Axis Value to 700
Dragging the animations
- Drag in The Animation you want, in this case the Zombie_Idle Animation to the left hand side of the screen
- Click on the diamond you just created from the drag and drop operations
- Speed will appear on the top(If you named it that) make sure its set to 0
- Next Drag in your walk animations in the middle
- Click the diamond and set the speed to 500 (The maximum character walk speed in unreal is 500 by default)
- After that drag in the run animation
- Click the diamond and set the speed to 700
You should see something like the picture below
To Actually make use of this blend space we have to make a Animation blueprint, that
will get its owner(Attach actor) speed, and choose the animation based on that speed.
You can hit play now to see how it transitions from idle to walking to running


