Height Maps & Landscapes: Difference between revisions
Jump to navigation
Jump to search
No edit summary |
No edit summary |
||
| Line 18: | Line 18: | ||
2.4 Select your Heightmap File | 2.4 Select your Heightmap File | ||
2.5 Select your material instance with your Landscape Layer Blend Nodes | 2.5 Select your material instance with your Landscape Layer Blend Nodes | ||
[[File:Landscape_Layers_Height_Map.jpg]] | [[File:Landscape_Layers_Height_Map.jpg]] | ||
3. After the import you can assign Those layers to other Height maps | 3. After the import you can assign Those material layers to other Height maps, this will automatically put that material | ||
at the position indicated in the heightmap | |||
Revision as of 22:29, 14 January 2025
Height Maps(Pictures contain height data) and landscapes have a special relation as you can import a height map, have a material instance with layers and assign each of those layers a picture(A height Map)
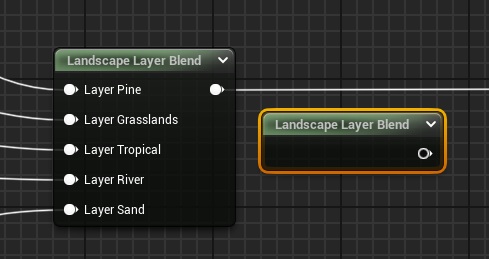
1. Start With a Material , Creating Layers with the node Landscape Layer Blend , and then creating a material instance
2. Start With Importing a Height map, and for the material
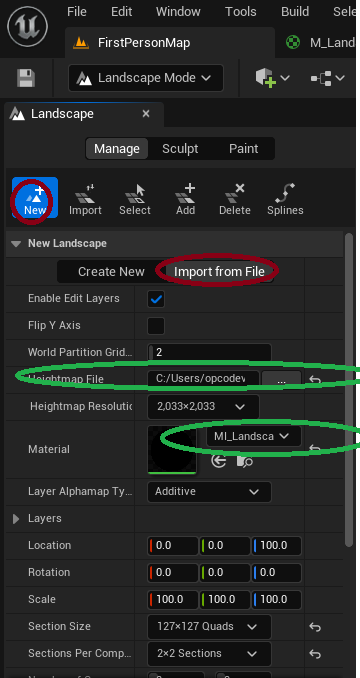
2.1 Go to Landscape Mode 2.2 Select New 2.3 Click Import from file 2.4 Select your Heightmap File 2.5 Select your material instance with your Landscape Layer Blend Nodes
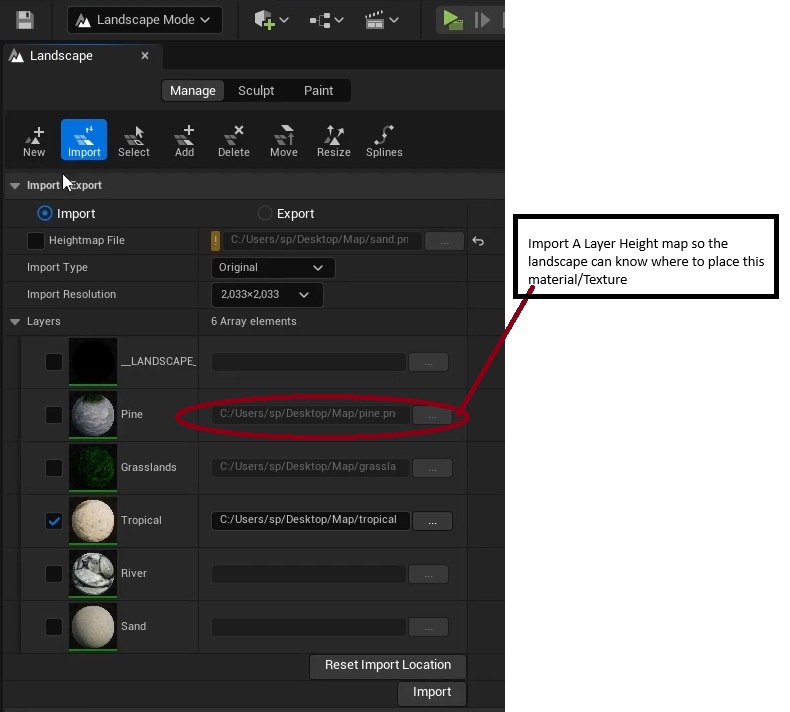
3. After the import you can assign Those material layers to other Height maps, this will automatically put that material
at the position indicated in the heightmap


