Creating A New Animation For A Skeleton Mesh
Note: To use the Sequencer for animation the Character(Skeletal Mesh) must have a IK_Rig? or a Control Rig
setup, not every Skeleton Mesh has one, you can create or add one to the character,
See Creating a IK_rig or Creating a Control rig
Control Rig allows Animation and is closely tied to the sequencer.
The steps are as follows:
1. Create a new sequence
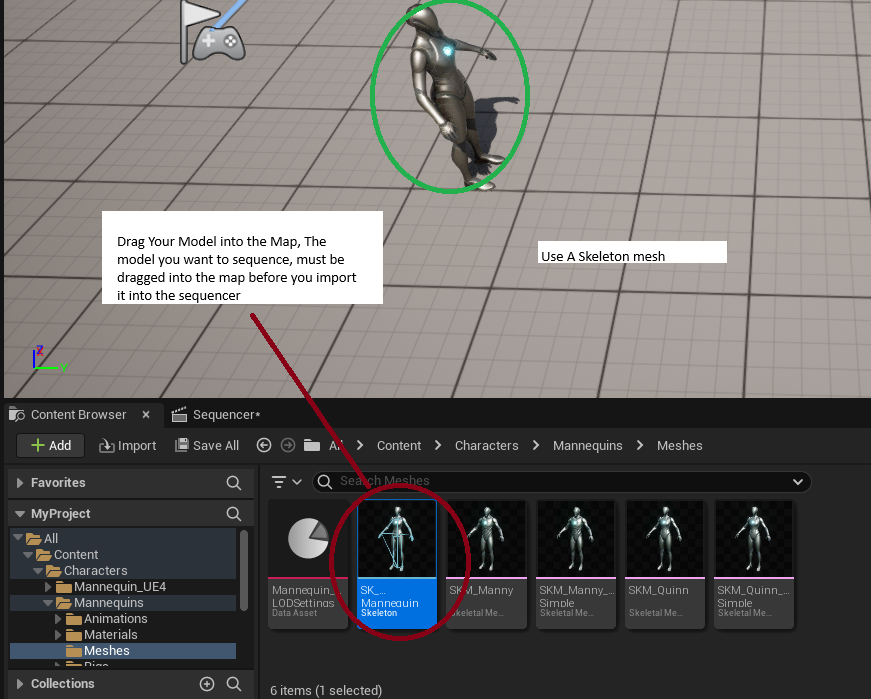
2. Drag A Skeleton Mesh into the map
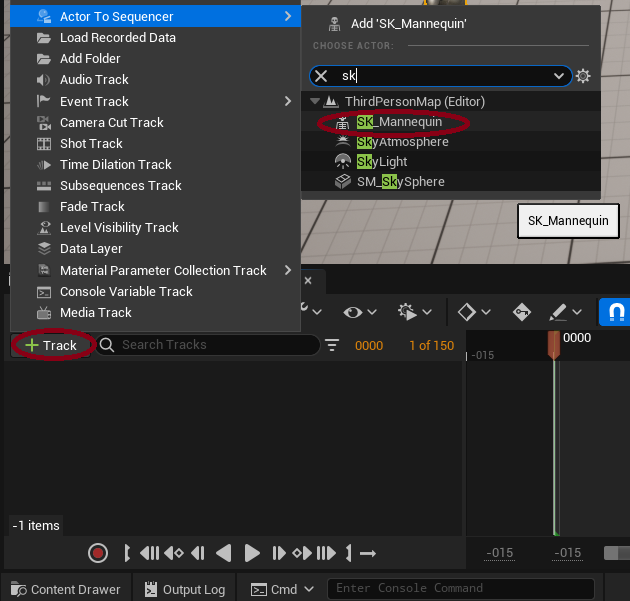
3. Open the Sequencer, and click on +Track, and add Actor to Sequencer:
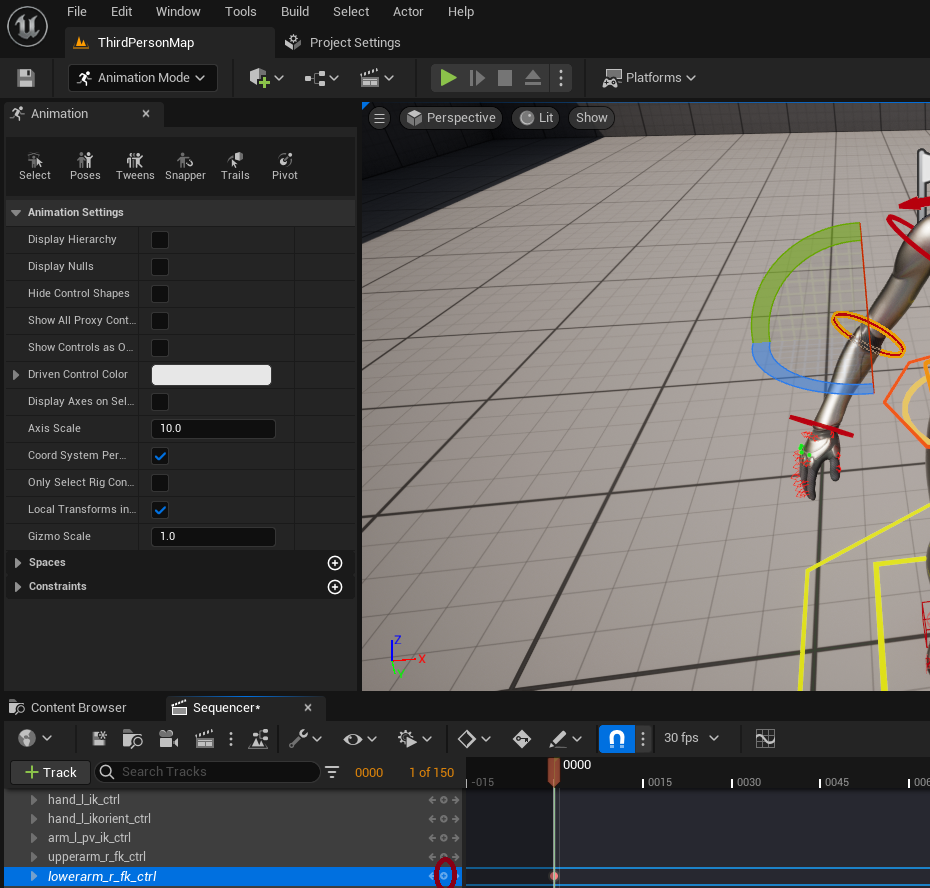
4. Click on the body part you want to select, it will automatically select it in the lower
left hand window in this case "Lowerarm_r_fk_crtl" and click on the Keyframe Whats circled
in red
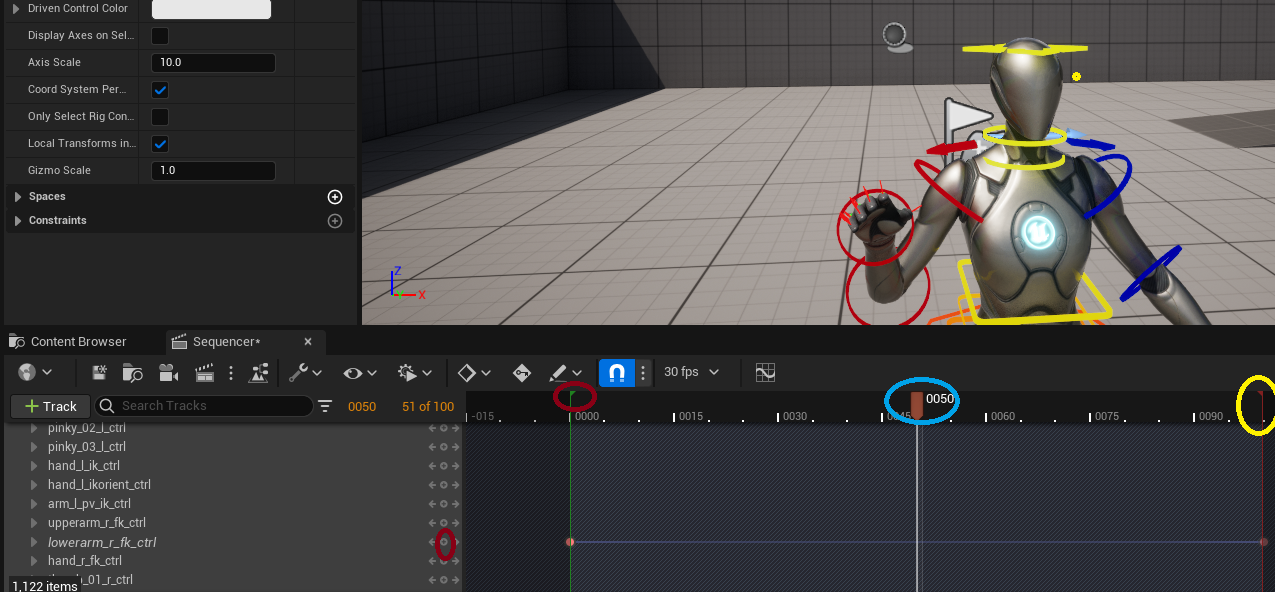
5. Drag the Red bar(Highlighted in yellow) to Position 0100 which is 1 second. This is the ending time for your animation
5.1 Drag the Current Time Bar(Highlighted in blue) to 0100,
5.2 Make changing to the current selected control point(In this case lowerarm_r_fk_crtl)
5.3 click add keyframe, this will interpolate between 0 and 0100 with your changes, you must make changes to the arm for it to be actually animate(Obviously)
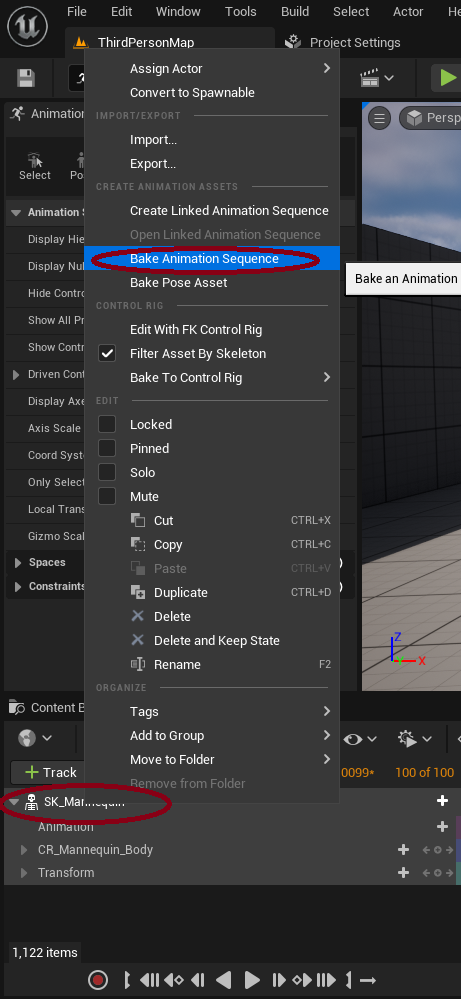
6. Once finished right click the Skeleton Mesh you imported Highlighted in red 6.1 Then click Base Animation Sequence
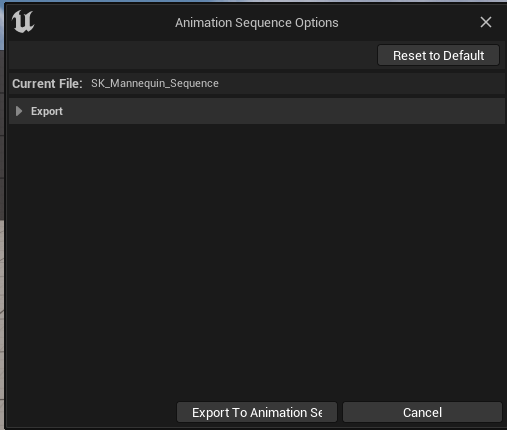
7. After you click select a folder and hit ok, A Animation Sequence Options window will show click on Export To Animation Sequence button, (Don't need to change any options)

