Creating A New Animation For A Skeleton Mesh
Control Rig allows Animation and is closely tied to the sequencer.
The steps are as follows:
1. Create a new sequence
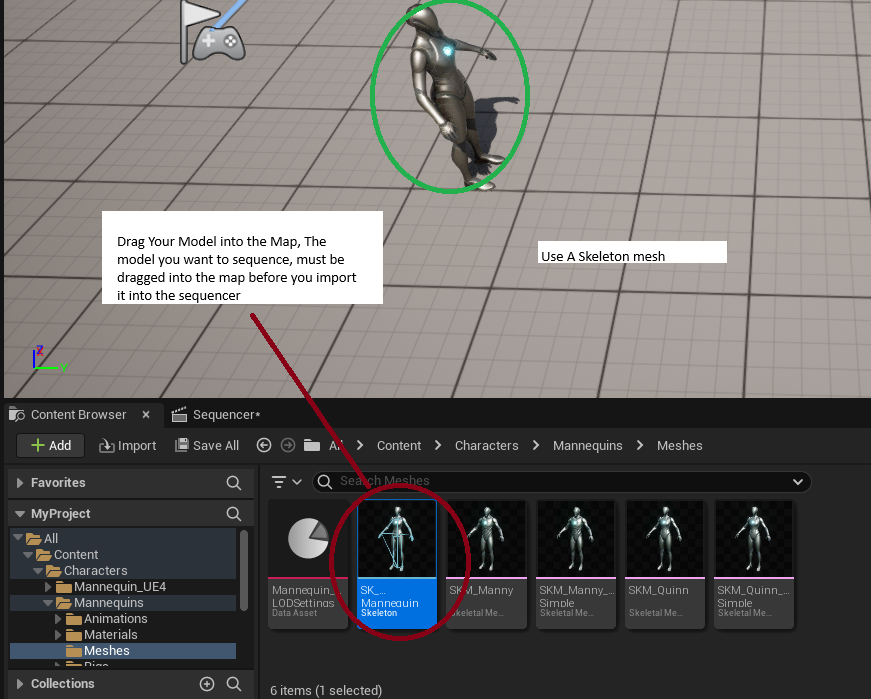
2. Drag A Skeleton Mesh into the map
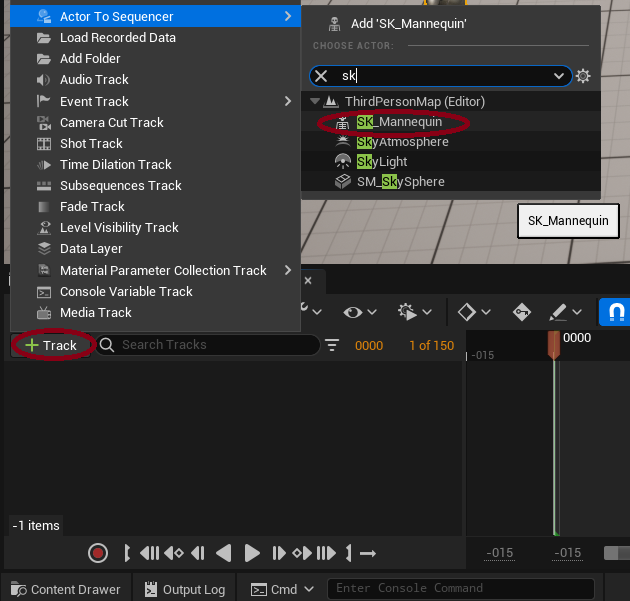
3. Open the Sequencer, and click on +Track, and add Actor to Sequencer:
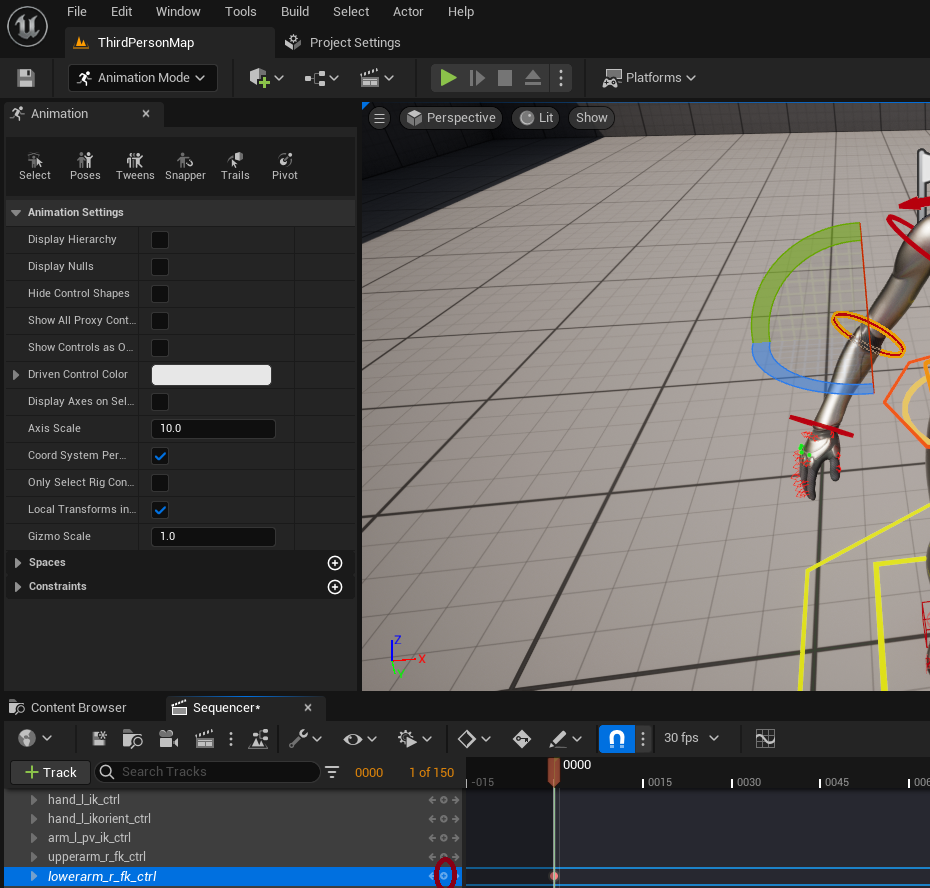
4. Click on the body part you want to select, it will automatically select it in the lower
left hand window in this case "Lowerarm_r_fk_crtl" and click on the Keyframe Whats circled
in red
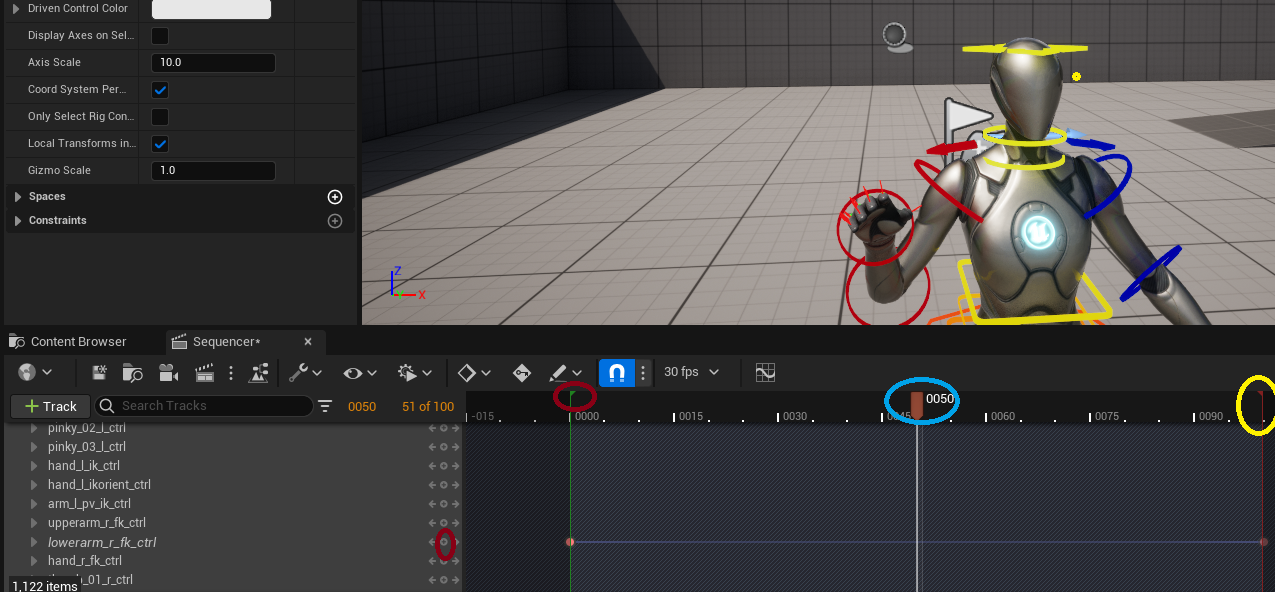
5. Drag the Red bar(Highlighted in yellow) to Position 0100 which is 1 second. This is the ending time for your animation
5.1 Drag the Current Time Bar(Highlighted in blue) to 0100,
5.2 Make changing to the current selected control point(In this case lowerarm_r_fk_crtl)
5.3 click add keyframe, this will interpolate between 0 and 0100 with your changes, you must make changes to the arm for it to be actually animate(Obviously)


