Enhanced Input System
The Enchant Input System is unreal's modern way to handle user input, instead of using the .ini files.
It features remapping, and abstraction of Direction which makes the keyboard act more like a joystick.
WASD movement, becomes 2D(X Positive and negative and Y positive and negative) for a total of four direction.
1. Enable the plugin if not already(Unreal 5.2+ example have it enabled already)
2. If using c++ You must also include "EnhancedInput" in your Source\<project_name>\<project_name>.Build.cs
using UnrealBuildTool;

public class inino0 : ModuleRules
{
	public inino0(ReadOnlyTargetRules Target) : base(Target)
	{
		PCHUsage = PCHUsageMode.UseExplicitOrSharedPCHs;

		PublicDependencyModuleNames.AddRange(new string[] { "Core", "CoreUObject", "Engine", "InputCore", "HeadMountedDisplay", "EnhancedInput","UMG","GameplayAbilities" });
	}
}
3. The Enhanced Input System uses two main parts Input Actions and Input Mapping Context, Input Actions are the name
of your Input, like Shoot.
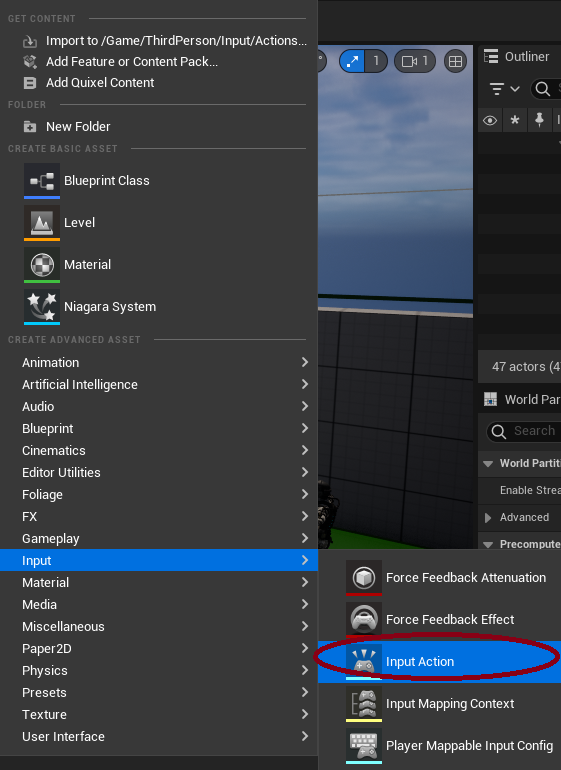
4. Create a new input action, By right clicking the content drawer, and selecting Input->Input Action
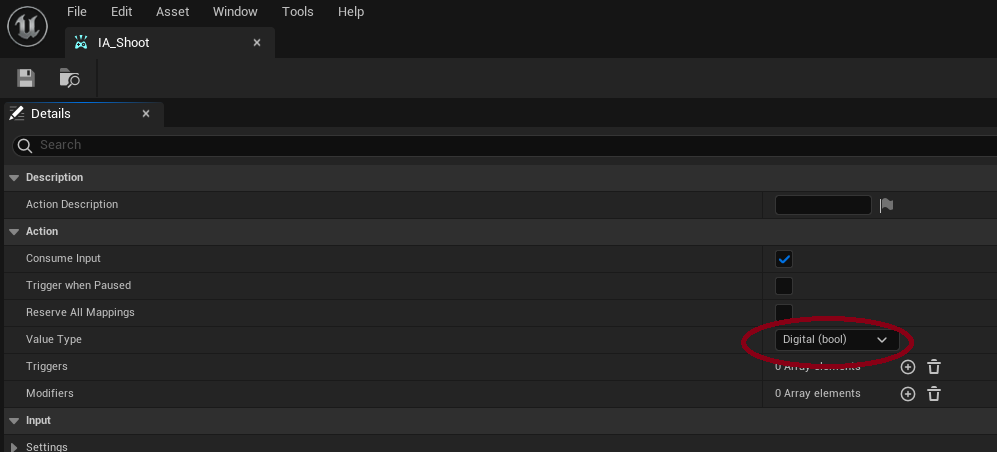
5. Make a new Input Action called IA_Shoot, and make sure its value Type is set to Digital(bool) Digital(bool) is used when you want to have a binary(on/off) state
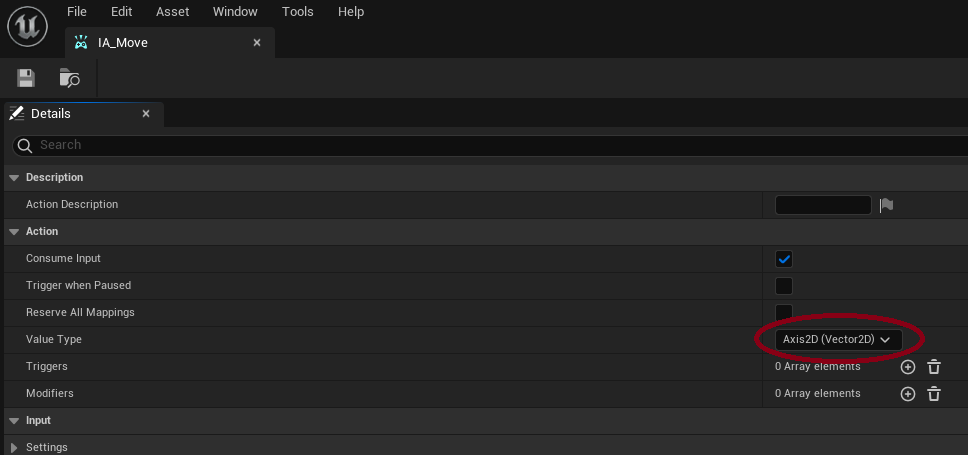
6. Make a new Input action Called IA_Move and set its Value type too Axis2D(Vector2D)
Axis2D(Vector2D) is used when you want a movement vector for the input, this is helpful for WASD movement
as we no longer require four separate events, but instead one event, each key press will return a 2D vector
that can be added on to your current vector for movement.
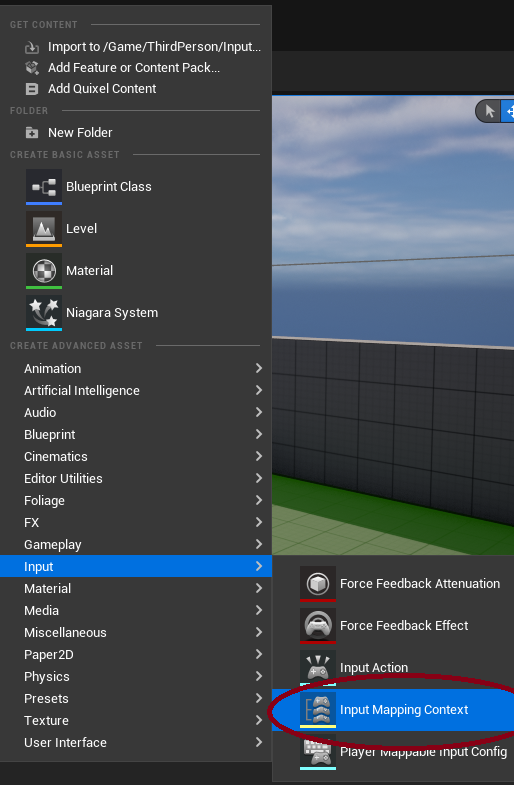
7. Create a IMC_Mapping_Context , by right clicking the content draw and selecting Input->Input mapping Content
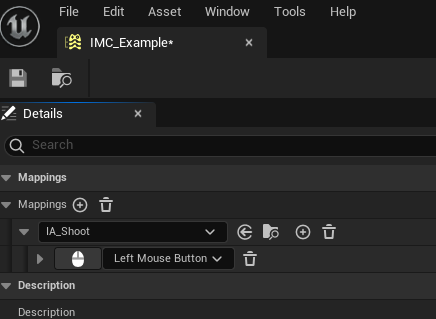
8. Add a new Mapping in the IMC_Mapping_Context you just created and select the IA_Shoot and click on the keyboard then left click (Clicking on the keyboard and pressing a key will select whatever key you have)
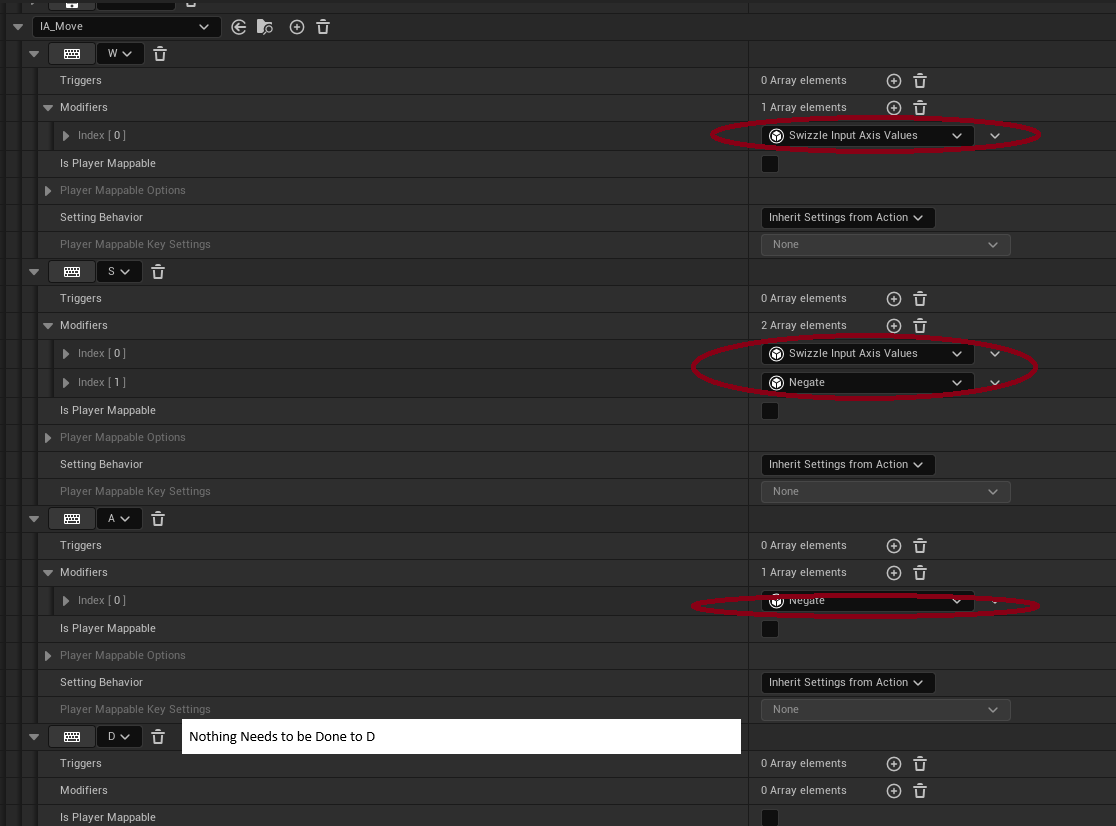
9. Add the IA_Move, this is far more complicated than a simple Digital Bool
9.1 For the W Key Add a Modifier Swizzle Input Axis Values, Normally the Input returns -X or +X, but swizzling changes the vector to +Y
9.2 For the S key Add Modifier Swizzle Input Axis Values and Add Negate, this changes the vector to -Y
9.3 For the A key add Modifier Negate, which will be -X
9.4 For the D key no modifier is needed as it will default to +X

